FITTING INFORMATION
Here is the information required to fit some of the roofing materials we supply. If you need advice, please call us.

Metal Building Material Suppliers Metal Sheeting Fitting Instructions
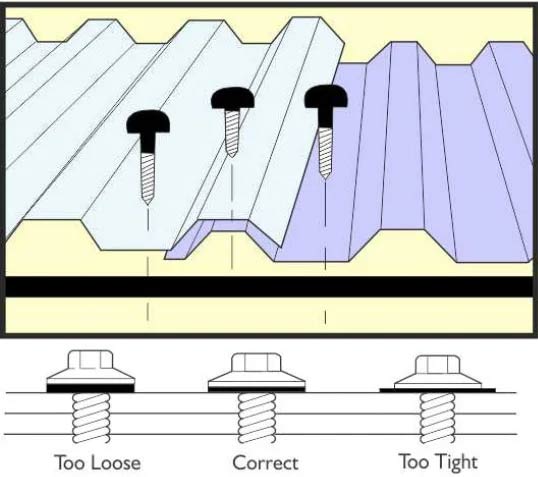
Phoenixs profiles are straightforward to install and should be securely fixed using self-drilling screws. These should be positioned through the troughs on the box profiles & tile form, and through the peak on the 3″ corrugated. The fixings go on either side of the lap, with two additional fixings placed through the central trough for optimal stability.
A comprehensive range of accessories is available upon request, including trims, gutters & fixings. It is essential to apply the correct tightening torque to all fasteners to ensure a secure and durable installation.
WhatApp our team to get Faster replies & pricing for your projects!
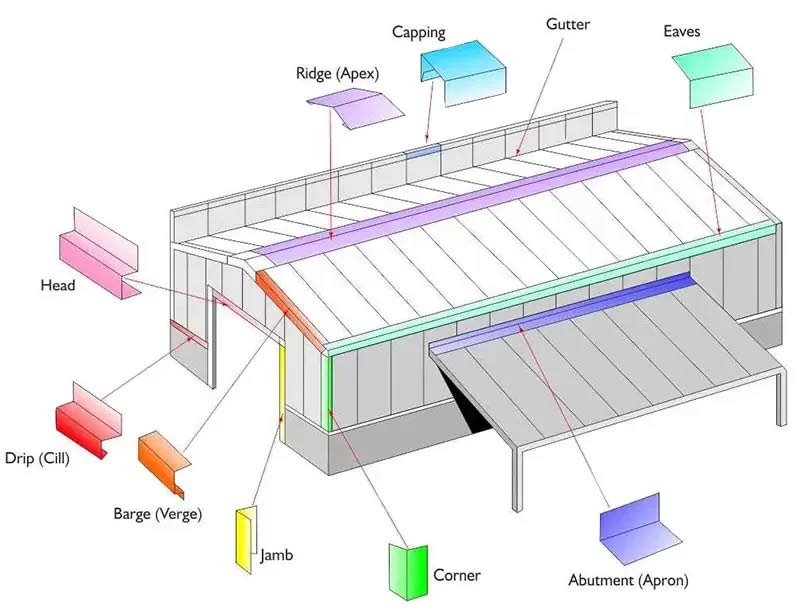
All flashings are purpose made to customers specifications in full range of colours and finishes in lengths of up to 3 meters.
It is advisable to specify welted edges for added rigidity as well as eliminating sharp edges, thus allowing easier on-site handling.
Flashings should be securely fixed using stitcher screws.
400mm centres on roof slopes under 15°. 450mm centres over 15°.
Vertical flashings should be fixed at a maximum of 450mm centres. For single span roof or wall construction, stitching should be maximum 300mm centres.


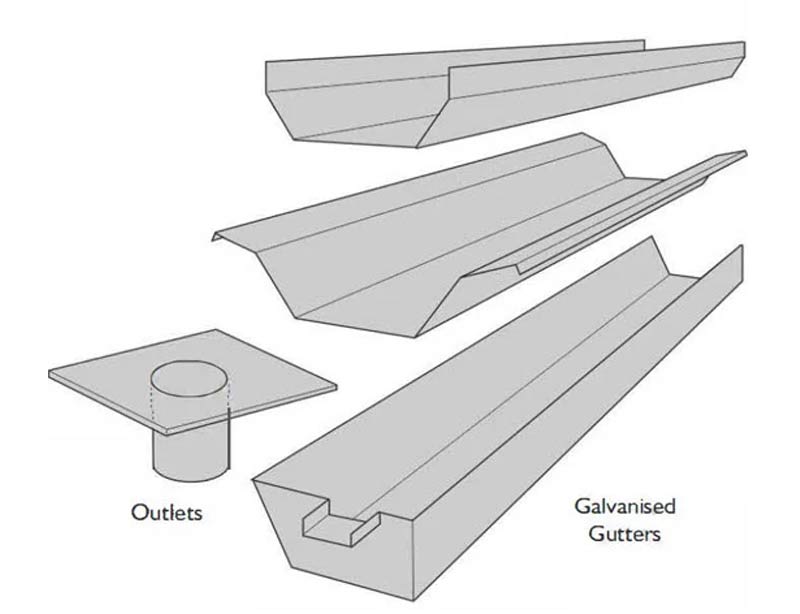
Before beginning the installation, ensure all supplied components, including gutters, downspouts, brackets, and fittings, are correct. Measure the roofline and mark a slight slope of 1/4 inch per 10 feet towards the downspouts using a chalk line. Plan the placement of the downspouts to align with the existing drainage system.
Start by installing the brackets, marking their positions along the fascia every 24-36 inches. Secure them with screws, ensuring they follow the pre-marked slope. Once the brackets are in place, position the gutters onto them and secure them according to the system’s specifications—this may involve clipping or screwing them in place. If required, apply gutter sealant at the joints to prevent leaks.
Next, attach the necessary fittings. Secure the end caps and outlets, making sure they are properly sealed. If the system consists of multiple sections, use the supplied connectors to join them, fastening with screws or rivets as needed.
To install the downspouts, connect them to the outlets and attach any elbows to guide water flow. Secure the downspout to the exterior wall using brackets every 3-4 feet, ensuring it directs water away from the foundation.


